
Disclosure: some links below are affiliate links, which means I'll earn a tiny percentage of a purchase you make through them, at no additional cost to you.

I dunno about the rest of you, but over the last 2 years I've seen a LOT of needle punch rugs, patches, and hanging art, and I've been wanting to try it so bad!! So I finally bought the goods!
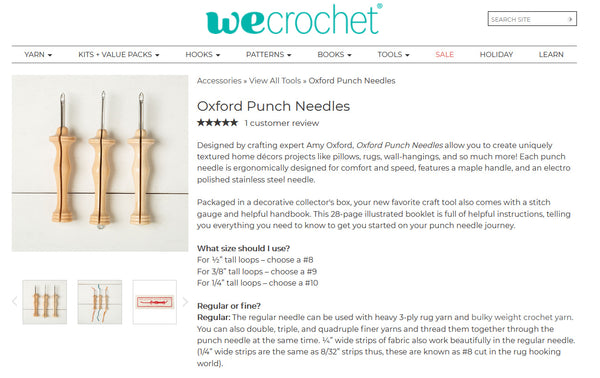
I figured I should buy a needle that would be good for coasters and patches, with very short loops. The shortest possible. And a needle that would work with worsted weight yarn, since it's the yarn I have in the largest amount. So I did some research and found that the Oxford punch needle, in size 14 ("the mini"), was the one for me!
WeCrochet happens to carry it, and they had a good black friday sale, so I treated myself.
Then I needed some monks cloth. I first went through the shopping tab of google search, and there were a bunch of amazon results, but most of them had absolutely terrible reviews lol. So I tried a few fabric websites I have bookmarked, and none of them carried monks cloth!! Okay, so what about michaels? Online only, not in my store, and I didn't feel like paying extra for shipping. Sigh. Then I figured there must be Etsy sellers, buying cheap in bulk and selling in small quantities...yep! Bingo! Found a great shop in Arizona (right next door to me in New Mexico, means fast shipping!) and they ALSO sell punch needles, embroidery punch needles, and cotton for embroidery punch needles. I will definitely purchase from them again!

Embroidery hoop? Already had on hand! I've got a 6 inch, 4 inch, and a 3 inch just hanging out in my craft room.
As for yarn, I looked at my stash, at colors I didn't have any plans for (I've been sent a few randomly from WeCrochet hehe), and planned a design around them! I'm using all Brava worsted yarns in my coaster. So, because it's acrylic, it's for cold drinks only! Very hot things will melt it. Warm things are okay though.
Glue! Glue is great for small projects. I used modpodge because...I had it. It does give a nice stiffness to the back of the project, so I definitely think it's fine to use. Fabric glue would also be a good choice, probably even better tbh. I don't really love the one I currently have so I need to find a new brand.
Well, I did for my second project. My first project, I just grabbed some yarn scraps and went to town! Haha. As usual for me, I learn from just getting my hands dirty, THEN I go back and watch tutorials. Do what makes you happy hahaha.
I decided on making a Luna from Sailor Moon coaster, because I had a nice dark purple for her! So first I did a messy sketch in procreate, then cleaned it up, then printed it out!
TLDR; Supplies
- Oxford Punch Needle in size #14 "the mini"
- Monks cloth
- Worsted weight yarn (use wool if you want a coaster for hot items)
- 6" embroidery hoop
- Some kind of glue (white glue, fabric glue, honestly whatever ya got is probably fine-NOT hot glue)
- Fabric for the back. Wool felt is the best choice for little things, but I used some acrylic I had on hand. For rugs you should get something stronger? I haven't researched this.
- If you wanna skip all this kerfuffle, you can buy punch needle kits at WeCrochet and there are literally thousands of results on Etsy. I actually wrote up a blog post featuring a bunch of cute ones from Etsy!
So how do you needle punch anyway?
Here's a little video of how it works:It takes a minute to get used to the motion, but basically: just push the needle through the fabric, making sure the tail is behind the direction you're working in. That's it!
Let's make a Luna coaster!
First things first, you need a design to print out. Guess what, you can use mine! Here's the png for you to print out yourself if you'd like!! It's an 8.5 x 11 letter size, so all you Europeans with your A5's and stuff, you'll have to resize it properly. The coaster should be about 4 inches / 10 centimeters wide.
Now cut out your monks cloth square. Whatever your hoop measures, add 2 inches to that, and cut out a square. Apply painter's tape to all the edges so they don't fray endlessly on you while you work, then insert it into your hoop.
Next, put your monks cloth over the paper, tape both of them over a window, and use a marker to trace the print onto the cloth. Use a light box instead of a window if you're fancy like that and own one. You could also have some exacto knife fun and make a stencil instead, and trace that on.

Now, when you're needle punching, you're actually working on the back side of the work, so if you have text or an asymmetric design, be sure to print it REVERSED, so you draw it on reversed, so it's the correct way around! However, I really like the look of the back side of punch needle pieces for artsy wall hangings, so you might not want to reverse it, if you decide the "back" side is the right side! Just something to keep in mind.

Where to start?
After seeing some blog posts and videos, I think it's good to start with your outline of the whole image, then outline the details, then fill in the details, then fill in the rest of the piece. I ended up filling in the details first, and who knows if it really made a difference?
Punch that needle!
So go forth and craft! This is the fun part, you get to draw with yarn! Here's a little video of the back side, which is the side you work on, vs the front side!
Finishing
I watched these two videos to figure out how to finish. I'm not really fully satisfied with either method to be honest, and I tried each one on a different piece.
I like this one, but the monks cloth just frays so much that it's annoying haha.
This one seemed like a great solution buuuut the layers were REALLY hard for my poor little scissors to cut through, and it seems like a great way to totally destroy them. So I won't be repeating this one again. I really like the clever idea of gluing the long strands of yarn around the bottom though, I did that!
So for my next one I might look for more videos/blog posts and see if I can't find a solution I like better. :)
What I will do differently next time
So obviously I learned a lot from my first project, and I'll learn more every time I make a new punch needle project! But here are a few things that I'll try to keep in mind next time, in no particular order:
- Make a thicker outline. You can see bare spots around the border in some of my photos, because I didn't add enough loops! So be generous.


- Be more precise when outlining. The face shape isn't symmetrical because I didn't follow my line well enough LOL
- Make fewer loops around details. Too many loops distorts your shapes! Both the small shapes and the outline of the shapes just need fewer loops.
- I'll look for more finishing methods to try!
Tag me on social media if you make my Luna coaster!
Tags: animal, cat, Printables, punch needle, sailor moon, tutorial


